Assignment 1
This afternoon I went to the post office and dropped off my first assignment of the Society of Botanical Artists Distance Learning Diploma to be sent to Guy William Eves, a wonderful botanical artist and tutor on the SBA Diploma. It feels incredibly exciting (and intimidating!) knowing that he will be judging my work. He will also be marking Assignment 2.
For Assignment 1 there are 3 components: a simple line drawing, a stippled drawing, and a full tonal pencil piece.
For Part Two of my first assignment they ask us to use the stippling technique on a flower, stem and leaf. We could use either pencil or ink. I’ve never stippled before, and after practicing with pencil and ink I decided that pen was much neater, much cleaner and gave a much better result!
Stippling is fun, but requires a lot of patience. Only now I realise actually how much detail about the subject you can portray just through lines and dots!
For Part One, I chose to draw a rose. I liked the idea of capturing the delicate petals as well as the strong leaves with serrated edges. The idea was to create a line drawing on watercolour paper, as if you would be about to paint it (i.e. faint lines, with only the minimum amount of detail required on the page). The image to the left doesn't demonstrate this at all, I'm afraid, as the only photo I have is of the ink drawing I created prior to transferring onto watercolour paper! In the last image at the bottom of this blog post, you can see the pencil image.

Part 1: Line drawing of a rose.
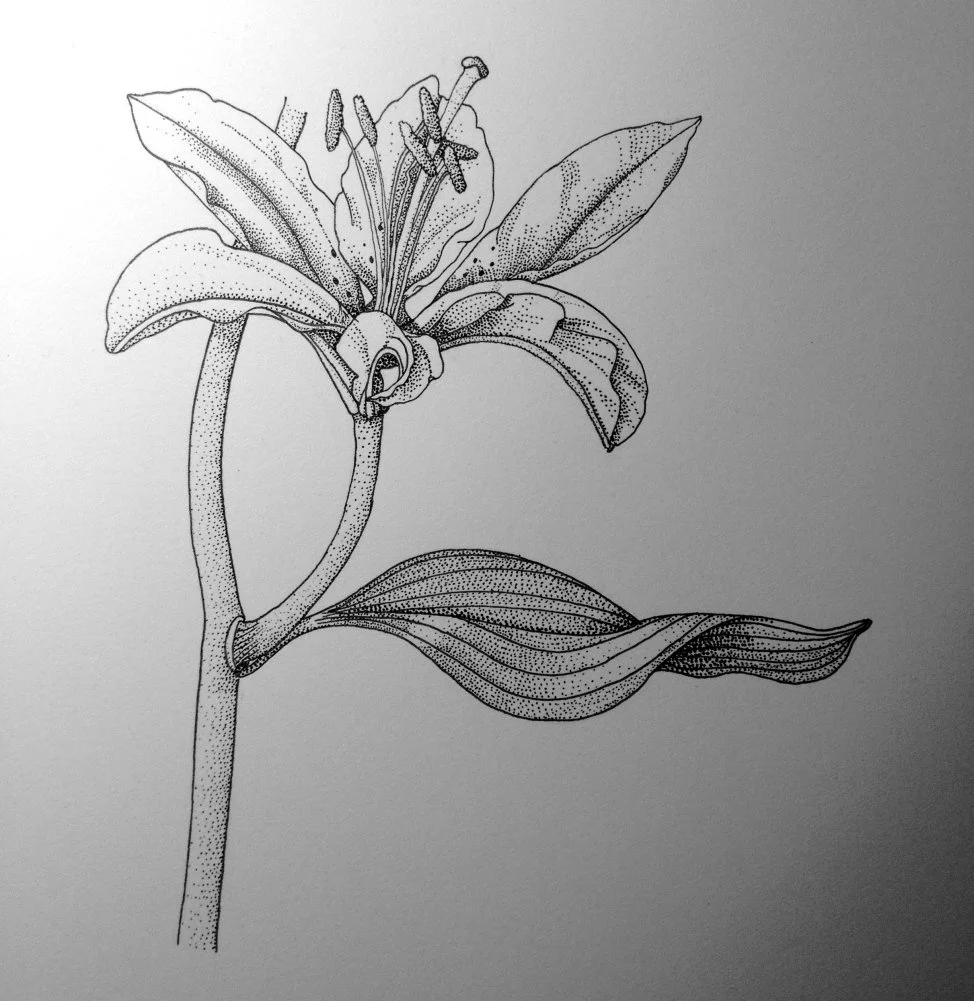
Part 2: Stippled Lily, in ink.
A bit about stippling:
This is only my first attempt, so I’m no expert, but I can hopefully pass on some tips that I have learnt doing this exercise:
- Start with a clean, clear line drawing. Include any details such a main veins, thorns, and any defining features such as small areas of pigmentation. Be happy with it before you start thinking about stippling. Once you have started stippling an area, adding lines on top is risky. It can end up very messy.
- Lay down your dots in lines, not randomly. With randomly scattered dots it can be difficult to keep the form and tone even, and can look chaotic. Lay down lines of dots, varying in lengths and varying the distance between them to create your darker and lighter tones.
- Take breaks. Laying down those tiny dots takes a lot of concentration. It’s very easy to want to power through, but you’ll soon realise your dots are becoming little lines, and your neat rows of dots are weaving all over the place and looking untidy. I reckoned 10 minutes stippling at a time was plenty! Lots of tea breaks…!
For Part Three of the assignment (a full tonal pencil piece) I chose to draw a hyacinth, and as I got into planning the composition I realised I wanted to include not just the stem and flower head but also the leaves, and also the bulb and the wonderful roots. Inevitably the piece got far too large and intricate for assignment 1… but I managed to get it finished.

Part 3: Full Tonal Piece, Hyachinth.
I really liked the composition, and I did enjoy drawing the hyacinth, but I have to say I do find pencils much harder than watercolours (I am dying to reach for my paintbrushes). I struggle with keeping the paper crisp and clean despite all attempts to do so (my drawing board has tracing paper everywhere!)
So below are the final 3 drawings that I sent today, plus a tonal strip and a note to my tutor with a few points, particularly querying the size of my pieces.

Feedback
I received my feedback for Assignment 1 about 3 weeks after I sent it off in the post. I got 8.9 as a final mark for Assignment 1. I was really, really pleased with the comments, and was completely surprised.

There were some really helpful comments within the feedback from Guy William Eves also. No-one has ever actually taught me how to use pencil before, it’s always been something that I’ve just got on with. For example, he explained that using a harder pencil to lay down graphite first, such as a 2H, and then lay down a softer pencil such as a 4B on top, you can get a much smoother and complete layer of graphite on the paper. I’m really looking forward to trying it out!
I definitely know that I am going to be completely in my element during my year out from my studies. I can’t wait to see what I can come up with for the next assignments. Now onto Assignment 2!